The Work Online and Travel the World Course – Bucketlist Bombshells Review

The Work Online and Travel the World Course – Bucketlist Bombshells Review

The Work Online and Travel the World Course – Bucketlist Bombshells Review

I currently have the freedom to work from anywhere in the world (with wifi!), whether I’m wandering cobblestone streets in Europe or confined to my house due to a global pandemic. But I wouldn’t have this freedom if it wasn’t for the Bucketlist Bombshells.

I first discovered Cassie and Shay, founders of The Bucketlist Bombshells (a life-transforming online education company), back in 2017. I signed up for their Design Skills (which I’ve reviewed on this blog in the past) and Tech Skills courses, followed by their main course, the Work Online and Travel the World Course.

Affectionately dubbed the WTC, this course does what it says on the tin – it helps you build an online business and then take that business anywhere you want to in the world! Many “work from home” opportunities are just that – locked to your location by product inventory or in-person clients.

Now, more than ever, it’s important to build a business with a little more freedom than that. If suppliers dry up and you can’t reach your clients in person, will your business still thrive? Cassie and Shay show you exactly how to build a business that is truly online so you can grow as the world changes.

This isn’t some instant business scheme. Right in the introductory module of the WTC, Cassie and Shay recommend that you set aside at least 3 hours a week to start building your business with a strong foundation.

Each of the modules contains video lessons and worksheets, as well as links to additional resources.

Module 1 – Defining Your Online Skills

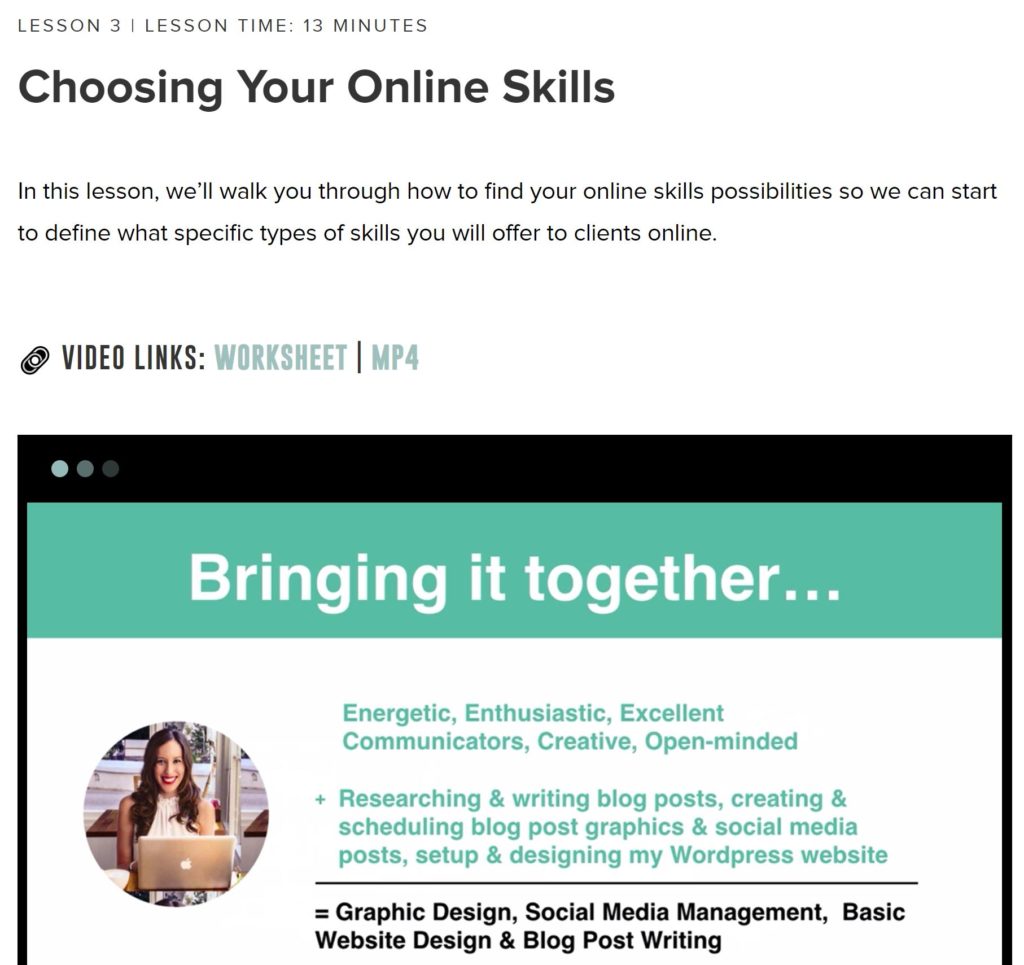
This module mirrors the Bucketlist Bombshells’ free workshop (which you can check out here!), with helping you blend soft skills and hard skills to figure out which type of business is right for you. I am a huge fan of personality typology, so I love that they use Myers-Briggs to help students identify their soft skills.
Module 2 – Rock the Freelancing World

Take the first steps to build your skills and grow your experience with online freelancing sites. While I didn’t use this strategy, it’s helpful if you’re feeling a bit apprehensive about getting paid for your services. It also offers tips you can use outside of these freelancing sites.

Module 3 – Build & Launch Your Online Business

This module moves away from working for rates others determine to setting your own rates – with lots of help and advice! From researching competitors’ rates and finding out the cost of living in destinations both local and global, to using the calculator they provide to analyze your lifestyle and needs so you can know your rates will provide enough to live on (and not be surprised by business expenses and taxes along the way). There are also videos to help with two key aspects of signing clients – one lesson on deliverables and client expectations, and another on landing clients via video calls.

Module 4 – Find, Network & Land Clients

This is one of the meatiest modules in the entire course. Not only do you learn how to to set up your packages, Cassie and Shay walk you through everything you need to include on your website, and then offer an hour-long tutorial to get everything set up on Squarespace! On top of that, they show you how to start finding clients outside of freelancer sites, sharing the insider tips they used to build their own businesses.

Module 5 – Running & Rockin’ Your Online Biz

Setting up smooth processes is absolutely key to wowing your clients and growing your business (without going insane trying to remember everything)! Cassie and Shay walk you through SIX of their favorite programs to keep things organized, as well as outlining a workflow and a finance sheet (complete with tutorial) to track everything.

To be honest, I already owned or subscribed to different software than the ones taught within this module, so it wasn’t as useful for me. Also, many of these programs have their own video tutorials, which are keep more up-to-date. The biggest benefits of this module are that it helps you to figure out the types of programs your business needs (a way to send proposals, a way to schedule calls, etc.) and gives you tips on how to use these programs for your specific business (what features are important, what can you ignore for now).

Also, while the finance sheet will help you get a great overview of your business and its money, you’re going to want to invest in some other sort of accounting software soon after you get a client or two under your belt (or before).

Module 6 – Run Your Biz & Jet Set Around the World

Finally we get to the Travel the World part of the WTC! This is where the course differs radically from many other “start an online business” courses and programs. This module is full of practical advice like choosing where to go, how to book accommodations in your new place, how long to stay in one area, and more! They also keep you on track with your business during this transition – remember, you’re not on vacation here!

One of the main points of this module is moving somewhere with a low cost of living, so that you don’t have to worry about bringing in as much money while your business is still growing. Also, it’s up to you how soon you want to jump into the travel part of this after you start your business.

My situation was different. I have little desire to live in many of the locations they suggest (which are often in hot climates – I prefer 60F/15C weather!) and wanted to explore Europe more instead. While some countries in Europe are lower cost than others (generally warmer spots too), it still would be a big investment, as I was also planning to keep a shared apartment back in the US so I could spend some months of the year near my family.

Instead, I found a different option to make my specific travel dreams come true – house sitting! I have a whole post about it here. I’m watching people’s homes and pets (usually cats) while they travel. My sits can last anywhere from 4 days to 2 months, and I’ve stayed in England, Scotland, Ireland, Germany, and the US this way.

Bonuses

The Work Online and Travel the World Course includes a number of bonuses (more if you pay in full), but the best ones are included for all students – the student Facebook group and monthly live masterminds!

In my opinion, these outweigh the value of the course itself. Wherever you are in your business, it’s amazing getting personalized advice any time you have an issue! You can post within the group to get tips from other students, alumni, and community managers. This is great when you have more simple questions or those that could use a quick response. But the mastermind sessions are amazing when you have a more complicated or in-depth question about key parts of your business and life as an entrepreneur.

There are also literally dozens of past sessions full of helpful advice! And if you’re not able to make the live masterminds (which are generally at 5pm Pacific/8pm Eastern – so 1am or later when I’m in Europe), you can submit questions ahead of time and watch the replays.

Conclusion

I highly recommend signing up for the Work Online and Travel the World Course from the Bucketlist Bombshells if you want to start an online business! This course will take your from idea to packing your bags! However, there are some people who won’t benefit from this course as much as others.

  1. If your business is already established. This course is aimed at beginners, and while you may greatly benefit from the monthly masterminds, the bulk of the course is about setting things up in your business.
  2. If you’re looking to market products, courses, or coaching services. The focus is on setting up a business model for virtual assistant, design, web design, social media management, and similar services.
  3. If your focus is on being an influencer or blogger. If you want to make money with paid sponsorships or ads, this course won’t help you with that.

But this course is for you if you want to use the skills you already have to start getting paid by clients, if you’re willing to put in the work, and if you want a framework to follow to build a solid business!

If you have any questions about the WTC, leave me a comment and I’ll answer!

Disclaimer: I received compensation for this review, however, my opinions are my own and I had already purchased and benefited from this course years prior.

How to Travel the World as a House Sitter

How to Travel the World as a House Sitter

How to Travel the World as a House Sitter

This post has been expanded into a FREE ebook! Sign up for it here!

I started my Pinterest business so I could travel more. I love spending time in Europe, and I was so excited when I was finally able to quit my job and travel as much as I wanted!

But travel is expensive. And since I still wanted to keep my home base in Pennsylvania (I have too many books to ever want to live completely out of a suitcase, and my family is here), and Europe is pricey – plus I had no desire to travel to ultra-cheap tropical locations and melt (I like 60F/15C days!), I had to figure out another way.

One of my clients travels the world full-time through house sitting, and recommended Trusted Housesitters. I love cats, but can’t have them in my rental home, so house sitting seemed like an amazing way to spend time with cats and see the world.

You can sign up for Trusted Housesitters for 25% off by clicking my link or using my coupon code: RAF177753 – Affiliate notice: I only recommend companies and products I trust! I have a paid annual membership to Trusted Housesitters and will get 2 free months added to my account if you use my link.

I browsed through some of the sits before signing up and was pleasantly surprised to find a lot of sits in the UK, my favorite place in the world! Given that the site was founded in the UK, the majority of sits are there, as well as other English-speaking countries like the US, Canada, and Australia. But there are a number of sits in other countries as well – from European countries like France and Germany to more exotic locations like Thailand and Dubai.

I realized that even one short house sit a year could easily pay for my membership – I would make it back versus paying for 1-2 nights at a hotel. So I decided to sign up!

Getting Started with Trusted Housesitters

The “trusted” part of the site’s name is vital, as verifications and reviews pay a key role in landing the house sits you want. I set up my profile with an indepth description of who I was, why I wanted to house sit, and my past experience (which was a little thin, only one time house/dog sitting for a friend of a friend). I completed the Basic and Standard verifications (you have to pay an extra fee for Enhanced, which includes a criminal background check, and it has never been available for me to get – possibly only for UK residents?) and asked my roommate and landlord to write a short recommendation. I added a few photos (you can also add a video if you want – I don’t currently have one) and I was ready to start applying to house sits!

Since I didn’t have any reviews on the site yet, I started small – applying to short house sits (a week or less) based in the UK. I drafted a long application letter, explaining that I was new and showing genuine interest in caring for the pet(s) and exploring the area.

Trusted Housesitters offers a number of options to help you search through available sits. You can filter based on the pets you prefer watching, the dates you are available, the length of sits, and more. They have a map option too if you’d like to visually see where the sits are located. They recently came out with apps for iPhone and Android, which have most of the functionally of the desktop site.

The user interface is far superior to the other house sitting sites I’ve explored, with tools to make finding a house sit as easy as possible. Update: one recent aspect I dislike is that the site now limits applications to 5 per listing. You have to be very quick to have any chance of getting a popular sit.

Landing a House Sit

You will generally hear back about the house sits you apply for within a few days, though some people may take a week or more to get back to you! Rarely, you may not get a reply at all. You’ll see “Reviewing Applications” when they’re still deciding, and “No Current Dates” if they picked someone already.

Another benefit of Trusted Housesitters is that home owners have to pay for a subscription, just like you. That means the listings are more likely to be genuine and the owners more committed to a booked sit. Other sites will sometimes let home owners join for free – which could mean more house sit listings, but you’ll sometimes need to wait longer for responses and perhaps do some double checking before making travel plans.

It’s very exciting to get an email back from an owner, saying that they’re interested in having you sit! They’ll probably have a few questions for you (depending on how thorough your profile and application were) and you can feel free to ask questions back. Some things you’ll want to consider:

  • What are the exact dates they want you to stay (sometimes they may want you to arrive the night before)
  • Flights and other transportation costs – you usually need to pay these!
  • Will you need a car or can you get by with public transportation?
  • House facilities (stairs to climb, washer included?)
  • Work expected (do they want you to mow the grass? How much work will their pets need?)
  • How long can you leave the house?

You don’t need to bring up all of these right away – just the ones that would make you turn down the sit if it’s offered. For me, I need good wifi and access to public transportation when house sitting in Europe.

In general, I’ve found that messaging back and forth is all that is needed for shorter sits, while longer sits they usually would like you to jump on a video call. Always try to be as open and transparent as possible – they are considering whether to trust you with their house and pets!

Once a home owner sounds interested in having me sit, I start to figure out if I can logistically make things work. Make sure you don’t agree to two house sits that overlap! Check travel times and other things you want to do around the house sit. Also, take some time to think things through – do you really want to house sit for this person, take care of these pets, and explore this area? Remember that you will be able to be more choosy about house sits after you get some reviews, but don’t take a house sit you have a bad feeling about.

The home owner will formally offer the sit within Trusted Housesitters’ messaging system, and you will accept it there as well. But you DON’T have to accept it right away, and you can still send additional messages without accepting. If it’s going to be more than a day before I accept, I let them know why (usually just making sure it will work for my schedule – which could mean you’re waiting for another sit you’ve applied to to get back to as well).

Don’t accept a sit unless you absolutely know you can make it work, aside from any unforeseen emergency coming up. The owner shouldn’t mind waiting a few days with it pending for you to make sure. And if you have accepted a sit and something does come up, let the owner know as soon as possible so they can find a new sitter in time.

During and After the House Sit

Congrats – you landed your first house sit! Now it’s time to book your travel! I always like to let the owner know when I book my flights/trains, etc. It will give them peace of mind that you are actually coming!

Your sitter should provide a welcome guide that walks you through the basics of things within the house and about their pets. Here’s when you can ask all those non-essential questions – if the welcome guide doesn’t answer them for you! You’ll also want to check how often they want updates from you, and how to send them. Sometimes, they’ll even give you lots of tips about things to see and do in the area – plus the best restaurants, nearby grocery stores, and the best way to get around.

Often, they’ll have a friend or neighbor listed in case you run into any problems during the sit. Sometimes they’ll welcome you with a meal the evening before the sit, especially if you’ll be staying in a guest bedroom for their last night in the house. They may even be willing to pick you up from the train station or airport! You’ll have a chance to meet the pets and be walked through their daily routine, and find out all of the little quirks of the house.

Try to ask any additional questions while they are there at the house. I like to phrase things like, “How do you usually do” whatever you’re asking about. I like to try to keep things similar for their pets and house if possible, but don’t feel like you have do everything exactly the same! Usually you will have been able to get a sense of how particular people are from their listing. Some things do have to be kept to a strict schedule, especially if pets need medication or special diets.

And then, enjoy the house sit! Make sure to take advantage of where you’re staying and explore the neighborhood and general area. But do spend a good amount of time with the animals, especially during the first few days as they get used to your presence.

Keep the owners updated with any issues and general status reports (you did ask how often they wanted to hear from you, right?). Snap a quick photo or two of their pet(s) as well if they seem likely to miss them. I also like to mention anything they seemed to be worried about before they left (yes, I did put the bins out on Wednesday night for garbage collection!).

Also, take advantage of the money-saving aspects of staying in a home. While you may want to go out and try the local cuisine occasionally, cooking at the house will save you a lot. You can also do laundry, and if you’re a digital nomad like me, get your work done with a steady wifi connection.

Try to keep the place relatively tidy while you’re there (you never know when an issue may come up where you need outside help, and you don’t want their repairman or neighbor to see 2 weeks of dirty dishes piled up!), and if you’re staying a week or more, be prepared to do a deep clean before you leave (if you’re very lucky – they may already have a regular cleaning service that comes by and you won’t have to worry about it!). I also like to throw my sheets and towels in the wash before I leave, to save them the trouble of washing them when they will already have a bunch of laundry from their trip.

Make sure you know exactly when they are arriving back, so you can be completely ready to go when they arrive. They will likely want to just relax and enjoy being back at home, but they may offer to let you stay the following night, especially if they will be arriving late. Or they may be okay with you leaving before they arrive if you have somewhere you need to be. Past owners have even given me a ride to the train or bus station when I’m heading out, but don’t assume this. You will also want to figure in a little time for a final report and to answer any questions they may have about their pet and house.

Reviews and Continuing to House Sit

Once you’ve finished a house sit, you can request a review from the owners on Trusted Housesitters, and give them a review in return. Hopefully, if you’ve followed all my advice above, you’ll earn a 5-star review! Try to be gracious and informative with your reviews of the house sit. You are staying in someone’s home, not a pristine hotel. I would not rate someone less than 5 stars unless they misled you about aspects of their home and pets, or if there were serious cleanliness or safety issues with the home that they did nothing about when you brought it to their attention. I like to include helpful bits of information for future house sitters in my review as well – walking distance to town or a bus stop, etc. – that aren’t already in the listing but could help them make a decision about whether the sit is a good fit for them. I also thank the owners and include a bit about the pets in my review as well.

And now that you’ve completed a successful house sit, you can start landing others! Just be careful to follow tourist visa rules as you start spending longer times abroad. As an American, I can spend 90 days in Australia, 90 days in Ireland, 90 days out of 180 days in the EU, and 180 days in the UK at a time, generally, on a tourist visa. While that does give me a lot of flexibility, I shouldn’t apply for a 4-month house sit in France. Also, if you are getting paid for house sitting, you will likely need a work visa. Many blogs about house sitting say you shouldn’t mention it during passport control, even if you are sitting for free, as some border officials will consider “accommodation as payment” and want you to have a work visa. I instead talk about my planned tourist activities and have a scheduled date of departure from their country or from Europe in general.

As you accumulate more reviews, you’ll find it easier to land new house sits, and you’ll be able to be more choosy about the ones you apply to. But popular areas will still get dozens of qualified applications, so be sure to check the site frequently to get the gigs you want!

Have you ever done house sitting before? I’d love to hear about your experiences! Also if you have any further questions for me about it, be sure to leave a comment below! And don’t forget to sign up for Trusted Housesitters so you can start traveling the world!

Want to hire me as a Pinterest Designer and Manager to help you get more traffic, leads, and income for your blog or business? Check out this page to see what I can do to help you grow!

3 Things I Needed to Go From Wannabe to Successful Entrepreneur

3 Things I Needed to Go From Wannabe to Successful Entrepreneur

3 Things I Needed to Go From Wannabe to Successful Entrepreneur

I should be on a plane right now. Heading back to Pennsylvania, ready to resume my 8-to-5 on Monday.

Instead, I’m sipping tea at my lovely house sit in Oxford, waiting for my clothes to air dry (because dryers aren’t really thing in Europe), deciding what I want for dinner, and strategizing about how to grow my business.

Location independence was a dream of mine for so long, but I always had this fear in the back of my head that it wouldn’t happen. I was smart, but not special. Creative, but lazy. Great with ideas, but not ambitious in the slightest.

So I maxed out my two-week vacations with trips to Europe and NYC and Chicago, gradually started investing in better courses online from people who were living the life I wanted, and began hanging out in communities online with people who were starting businesses.

But I still had no clients, and it felt like I would never have a successful business. Then 3 things changed.

These are the 3 things that changed for me between “wishing” for location independence and it actually becoming a possibility!

1. I found a tribe. The Bucketlist Bombshells were all about having location independence, but not having to work for years and years to get to that point. Through their courses I rediscovered my love for design and learned the best way to start earning a steady income while traveling – an ongoing service-based business.

2. I found a niche. I was completely intrigued by the idea of being a Pinterest manager, but it seemed almost too good to be true. So I signed up for a course, and then a few others. We’re still bit of a newer thing, so Pinterest management often gets grouped with social media, even though it’s not very social. What I really loved about focusing on Pinterest was a) it used my design skills, b) I could do the work whenever I wanted due to scheduling aka complete time freedom, and c) it provided a tangible result for clients – more traffic to their websites.

3. I found a mentor/client. After a little success with Pinterest design, I knew I would need to have some ongoing management clients to bring in steady income. The problem was, while I knew so much about Pinterest from the courses I’d taken, I had no experience actually managing a Pinterest account for someone else! Enter Susi. I shared in her group promo thread an offer I was trying out – 50% off my services for 3 months – and she took me up on it! And she has shared about my work in her group several times, leading to additional clients. I’ve also gained so much from what she shares, from improving my mindset to making travel more affordable with house sitting!

That’s it. Those are the 3 things that changed for me, between being a wannabe entrepreneur to the beginning of an actual business!

How long did it take? I found my tribe in April 2017, and it took a bit before I bought their courses and started doing them. I first heard about Pinterest management in November 2017, and bought my first course in January 2018. I had my first Pinterest design client within a month, while I was still finishing up the course, and Susi became my first management client in March 2018.

Want to know more about my journey? Join the Create Wherever Female Entrepreneur Facebook group!

Want to hire me as a Pinterest Designer and Manager to help you get more traffic, leads, and income for your blog or business? Check out this page to see what I can do to help you grow!

Interview With Digital Design Strategist Heather Brockell

Interview With Digital Design Strategist Heather Brockell

Interview With Digital Design Strategist Heather Brockell

1. Tell me a little about you!

Hello, my name is Heather! I am 25 years old and live in Minneapolis, MN. A brief overview of me: I grew up figure skating, was a hockey cheerleader in college and I now perform part-time as a figure skater and singer and I work full time as a Digital Design Strategist. I am currently training for my first triathlon, travel as frequently as my bank account allows and watch the sunset as often as possible.

2. What were you doing before you decided to pursue starting your own business/location independence?

I graduated from the University of Minnesota in July of 2016 and landed a job as a figure skater and singer in an ice show based out of Florida. I loved what I did but I came across 2 issues:

  1. 50% of my job was based on skill and being able to perform all day every day. (Side note, there are very few days off in show business. For this particular show, we had 0-2 days off a month). The other 50% was based on how good I looked in itty-bitty costumes under spotlights that showed no mercy. It bothered me that so much of my job was based on what I looked like when I had spent so many sleepless nights and anxiety-filled days working to earn a degree.
  2. Shows are not permanent and because of that, my income was inconsistent. I wanted something to bring in income all year round but still allowed me to pick up and go anytime I needed to leave for a show.

3. What changed?

When I returned from my third contract, I was determined to find a way to earn money between shows. I looked into anything and everything like whether or not I qualified for Uber, seasonal jobs that lasted only a month, etc. but I felt like these were all temporary solutions and I wanted something long-term. In the midst of my search for a solution,I came across a Bucketlist Bombshells ad for a course that taught women how to work online and be location independent. Bingo. A light from heaven may as well have been shining down on it; I had found my answer. I bought the course within minutes and I haven’t looked back since.

4. What are some of the first steps you took? Looking back, would you have done anything differently?

I went through the courses and launched my business within 2 months. I started out on PeoplePerHour to build my confidence and once I had a few small jobs under my belt, I moved back home to North Dakota with the goal of landing bigger clients. This strategy worked like gold and I landed various jobs during my time there.

Are there things I would have done differently? Yes and no. I learned so much from every poor decision I made, I feel like it was worth making them but I can think of two things I wish I had known before I started.

First, I never realized how difficult the “business” part of it would be. When I started out, I was 100% focused on developing the skills I was going to offer. I never realized that that was only half of it. For anyone just starting out, there are two things you will need to learn:

  1. An amazing, knock-your-socks-off, out of this world service
  2. How to run a business that does 3 things:
    a. Gets in front of the right people
    b. Communicates and connects with your target audience
    c. Runs efficiently and makes enough money to pay the bills

Second, I was surprised by the amount of guilt I felt when I started. The image of my friends who work hard and HATE their job was like a movie reel that played over and over in my head. Each time I thought about how much I loved my job and how miserable they were, my guilt increased. I started working 12+ hours a day to cope with it and let me tell ya, that ain’t healthy.

I started using a planner from a company called the Best Self Co. and it revolutionized the way I define a successful day. I stopped clocking my hours and focused only on getting 3 major tasks done each day. Once I completed them, I was able to enjoy the rest of my day. Between the planner and the book “The 4-Hour Work Week”, I have developed a much healthier working relationship. When you work for yourself, it’s very easy to become a workaholic if you don’t set boundaries.

5. Tell me about your business! What do you do, who do you do it for, and why do you love it?

I do 3 things in my business:

  • Web Design
  • Branding
  • Copywriting

Many of my clients are involved in figure skating or athletics since that’s a big part of my inner circle, but I have also worked with financial companies, online TV shows, floral companies, elementary schools, etc. so my clientele has been very diverse. My ideal client is anyone who is a great communicator, does what they say they’re going to do and gives me clear feedback. (And giving me artistic freedom is always a bonus!)

I could write a book on why I love what I do but I’ll try to keep it concise. From a selfish perspective, I love being able to plan my own schedule, take vacation days without asking permission, not be a slave to my alarm clock and have the freedom to work from anywhere. I’ve been able to go home for birthdays, attend graduations, travel for weddings, visit my parents for a month at a time and take a 3 month road trip. I am also in a long distance relationship and I was able to help my boyfriend move, attended his graduation and fly to watch some of his hockey games in person.

Aside from the fact that I enjoy not being chained to one location, I genuinely love what I do. My friends joke that I’m the “mom” of the group because I’m constantly taking care of everyone. I feel like I’ve been able to put that to good use by doing what I do. A lot of clients I work with are very lost when they first contact me and I LOVE helping them grow their business or organization through their branding or website. My job is very fulfilling and I’m so grateful I live in a time that this lifestyle is possible.

6. Where have you gone with your newfound location independence?

According to official documents, I still live in North Dakota but I spend a bulk of my time in Minneapolis living with my sister. However, while MN is my home base, I frequently visit other places. This past year, I spent time in:
• Italy
• The eastern USA on a road trip
• New Hampshire
• North Dakota
• Oregon

This summer, I have trips planned to California, Alaska and Iceland. I have found that while I love traveling, I like having my home base to be around the people I love.

In the future, I would love to buy a place along Costa Brava, Spain, but for right now, I’m content with my life and the way it is now.

7. What is the most important lesson you’ve learned so far on this journey?

ONE lesson? Oh my, this is asking a lot, but I’ll do my best!

There’s no do-overs in life. You get the time your given here on earth and that’s it. You don’t have time to play it safe. I also want to point out that a lot of fears that hold us back are unfounded. Some businesses thrive on fear-based marketing. They make money by successfully planting “what if?” ideas in your mind (of scenarios that, let’s be honest, won’t happen) that convince you to buy a product or take an action. Just something to keep in mind when building a pros and cons list of a career change.

P.S.
I want to add that taking a risk doesn’t mean you have to quit your job, sell your house and travel full time. A lot of people do that and love it, but maybe your dream is to start an online business so you can be a stay at home mom who spends her free time baking cookies and attending soccer games. If that’s your dream life, go for it! Don’t feel like you have to fit any kind of mold that isn’t you. I will say though, be sure to travel at least a little bit. It’s the best education you could ever give yourself!

8. How have others reacted to this new direction for your life?

Very mixed but running off to join an ice show isn’t exactly the norm so I don’t think people were that surprised by it. I did get a few sassy comments like“it’s nice that you’re trying to start your own little business” but I just ignored them. Unless they were living a life that I wanted, I wasn’t interested in taking their advice. The people whose opinions I actually cared about were incredibly supportive and that is something I will forever be grateful for.

9. What people/resources have helped you the most?

First, I wouldn’t be here if I hadn’t enrolled in the Bucketlist Bombshells course. It really did change my life and I’m so thankful I came across it. I also took a course called B-school which is rather expensive (not something I would take if you are just starting out) but has really been helping me refine my business.

As I said prior, surrounding myself with people that encourage me has also been invaluable. It is, hands-down, the most important thing to have when taking on a new challenge. I already mentioned a planner by “The Best Self Co.” and I also want to add three books that I have found to be very valuable:

• Big Magic – Elizabeth Gilbert
o Perfect for any creative, especially if you feel guilty for pursuing a life you love.
• The 4-Hour Workweek – Timothy Ferriss
o For me, it started a little slow but it has a crazy amount of practical tips and tools once you get into it.
• Priceless – The Myth of Fair Value (and How to Take Advantage of it) – William Poundstone
o Uggghhh NUMBERS! This is any creatives nemesis when it comes to running a business but that’s not an excuse to ignore them. Again, this starts a little slow but push through it! You will learn a ton if you do.

10. Do you have any final tips for other aspiring digital nomads?

No one will ever give you permission to get started, you just have to do it. With that said, I would be wary about putting too much pressure on your business too early on. Starting a business is a lot of work and if you also have the pressure of paying your bills with it, it’s going to be stressful. My advice? If you’re working a full-time job that takes up most of your time, it will be difficult to build your business at the same time. Not impossible! Just hard.

If you are serious about quitting your corporate job, here’s what I would do: job hunt for a part-time job that will pay the bills and be easy to quit. Once you find it, quit the corporate job and work part-time until you feel confident your business can support you. Many people have not followed this and have still built incredibly successful businesses though, so take this with a grain of salt and do what’s best for you!

If you ever feel discouraged and want to quit, here’s my email: heatherbrockell@gmail.com. If you spend the time to reach out to me, I will return the favor and answer any questions you have for me. I can’t guarantee I will have all the answers, but maybe we can find a solution together. I have been blessed with an incredible support system in my life and I would love to return the favor and be that person to you if you need it.


Thanks so much for this interview, Heather! Be sure to stop by Heather’s site: Design by Heather Rae!

Want to hire me as a Pinterest Designer and Manager to help you get more traffic, leads, and income for your blog or business? Check out this page to see what I can do to help you grow!

My Experience Building a Quiz with Interact

My Experience Building a Quiz with Interact

My Experience Building a Quiz with Interact

This post contains affiliate links, which means I may get a small commission to fund my travels if you choose to purchase anything. I’m only an affiliate for products and services I’ve tried and loved, and will always be completely honest about any drawbacks or issues I find!

Are you as addicted to quizzes as I am? Whether I’m figuring out which Disney princess I am (Belle, duh) or evaluating my business knowledge and preferences, I love finding out more about myself.

So when Interact offered me an opportunity to try out their quiz-building platform, I jumped in right away! Who wouldn’t want an inside look at how quizzes work? (Well, I suppose some people won’t care, but I’m a complete geek about stuff like that!)

Starting with Interact

I started with a video walk-through of Interact’s site, and I was immediately impressed. Not only is everything clean and professional, but they have so many integrations and options available for businesses and bloggers to use for lead generation. When you combine the viral possibilities of a great quiz with in-depth data gathering, it’s clear that Interact can be a game changer for marketing.

And with clients like the World Wildlife Fund, The Home Depot, and Greenpeace, Interact plays in the big leagues. But small and medium-sized businesses are not forgotten. One of my favorite tech education sites, Skillcrush (a connection I discovered by happy accident), uses their platform to gain 10,000 subscribers annually, and Interact’s Lite Plan is robust and affordable enough for almost any solopreneur or start-up.

Quizzes can be dead simple or extremely complex. Interact has a library of more than 100 pre-built quizzes in many niches that you can use as is, or customize to suit your business. I started out by choosing one of these templates and examining exactly how all the different parts worked together. The most popular type of quiz is the personality quiz, where choices/answers lead directly to specific result options, but they also offer assessment and scored quizzes. After a few minutes poking around the pre-built quiz, I felt confident that I could create a custom quiz on their platform!

Building My First Quiz

I started with a fairly simple concept for the quiz. As a Pinterest manager, I have potential clients wondering if hiring me is right for their business. And to be honest, many times it’s not the right step for a business to take just yet. If they have no way to convert the traffic Pinterest brings, have no content to promote, or have more time than money to invest in their business, it may be better for them to wait. But for businesses that are ready, this quiz would provide reassurance that a Pinterest manager can help grow their reach, and it would also educate them about some of facets of Pinterest management (design, scheduling, A/B testing). And like some of my inquiry forms, this quiz would give me information about where they stand, to be better prepared for client calls.

Two vital techniques helped me create my quiz easily: 1. Start with the results, not the questions. 2. Draft your questions and the answers they relate to before you start building in Interact. I used Google Sheets to draft my quiz, putting the results along the top as columns and the questions along the side as rows. I learned from the demo and sample quiz that each answer can lead to more than one result, and multiple answers. So I repeated answers a few times in the columns when they would lead to more than one result, and fit two answers in one cell under one result if needed. You may want to grab a sheet of paper to draft if your quiz is threatening to get unwieldy in a spreadsheet.

Interact recommends 5-10 questions for quizzes, with 7 being the sweet spot for people finishing quizzes and getting accurate results. I ended up with 8 for mine.

Putting the Quiz into Interact

Since I had everything ready, creating the quiz in Interact involved mostly cutting and pasting what I’d already written into the platform. I reworded and expanded things as I added them, and even added a few answer options. While drafting was very helpful for getting organized, it was a little tedious entering more than 30 different answers into the quiz – but I do believe that extra step created a more refined result in the end. As I get more familiar with Interact, I believe my drafts will be a little more rough/conceptual before I move them to Interact’s platform.

Also, while my quiz is text-based, you can also use image answers! CC0 stock images from Pixabay are integrated right into the quiz builder, and you can upload your own images as well (there is 2MB limit per image, so you may need to resize first). I did include photos for the cover/intro of the quiz and each of my results, and I highly recommend you do the same, at a minimum. You can also add images to each of the questions.

I added the results first, then put in the questions one at a time, with their answers. I clicked the “Edit Results Correlations” in each question/answer page to match up the answers to the results, which was super easy!

Branding the Quiz

I chose my brand colors and the Google font I use on my site to make the quiz look like it belonged. I also was able to add my logo/favicon, but I was a little disappointed at limited options related to the logo. I also added my photos at this point in the quiz creation.

Quiz Integration

This was probably my least favorite part of setting up my quiz – but it’s mostly because Interact has so many possibilities and I wanted to do it right. Also, connecting to an email service is inherently a lot less fun than dreaming up a quiz! I really love that you have so many options with Interact’s platform – customizing calls to action for each result (which you can do when you create your result options, but I ended up going back and editing them at this point, once I had a clearer picture of where I wanted them to lead).

You can force quiz takers to give their email address before they get their results, but Interact recommends that you offer a subtle “skip this step” option as well.

Interact offers a number of different ways to incorporate the quiz on your website, complete with a WordPress plugin. However, I had several issues with trying to set up an announcement bar for the quiz. First, the color picker was extremely buggy, and I had a hard time adding my color hex codes, as most times I clicked on the popup it would disappear. I also wondered why it hadn’t carried over my brand colors from the quiz. Sure, I might want to switch them around, but it would save a few steps. You can’t change anything but the colors and the text – no font, sizing, button shape/shadow, etc. options.

You also can’t build more than one announcement bar option for each quiz. So with wanting to promote my quiz both here on Create Wherever and on my Quite Katie site, I was faced with a dilemma – which branding should I use for the announcement bar? The navy, light blue, and bright pink of Create Wherever would clash with the peach, teal, and burgundy of Quite Katie. But that was rendered moot by the next issue I faced.

Interact’s announcement bar covers fixed headers. Instead of sitting nicely above all your content like hello/announcement bars are supposed to do, it clumsily overlaps your vital navigation. When my announcement bar didn’t look nice with either of the two options they offered for placement, I researched the issue, and all their help files had was “oh, your site must have a fixed header” – no options for solutions. I reached out to them regarding this, but haven’t heard back.

Since my Quite Katie site has the navigation underneath the main header image on the home page, I was able to incorporated the bar properly on that page of the site only. I changed the branding to match that site, and it was good to go! But I still wanted to have the announcement bar integration here on Create Wherever. I tried searching for Interact and Divi (my site’s parent theme), but came up empty. I then began to look outside of Interact integrations and see how others had included hello bars with Divi. I found a fairly expensive plugin and a free Divi announcement bar generator. The generator had some styling issues (putting the button flush with the bottom of the bar instead of vertically centered) and it, but fortunately I know CSS and was able to fix the issues in the generated code.

So far, my solution works, but I would love to see Interact bring their announcement bar up to the level of the rest of their service. Perhaps they assume that larger companies will already subscribe to a hello bar option?

Conclusion

I’m super impressed with Interact so far, and it has great potential to help businesses grow!

As I just created my first quiz with Interact, I don’t have results to share yet! Look out for an update to this post, or (more likely) a link to a follow-up post after I’ve used Interact for a few months!

I do have one positive story already though – the day after I finished the quiz, a potential client was unsure if she needed a Pinterest manager. I sent her to this quiz, and her result was Yes! Her business could benefit from a Pinterest manager. We have a call scheduled next week!

Try Interact out yourself, and I’d love to hear about your results with the platform!

Want to hire me as a Pinterest Designer and Manager to help you get more traffic, leads, and income for your blog or business? Check out this page to see what I can do to help you grow!

Why You Should Not Use Free Stock Photos On Pinterest

Why You Should Not Use Free Stock Photos On Pinterest

Why You Should Not Use Free Stock Photos On Pinterest

We all want to save a little money when it comes to our blogs and businesses! One way we can do that is by using free stock photos – they’re often beautiful, high quality, and cost us nothing. What’s the downside?

The downside – everyone else has the same idea! So the best photos get used millions of times all over the internet. A friend of mine used a free stock photo for her ebook. Within a month, I had seen that same image on a Facebook ad, as the background to a quote on Pinterest, and as the feature image on two separate blog posts.

“What’s the big deal?” you may be thinking. And true, it may not matter much if someone who stops by your site has a vague recollection that they saw that photo before.

But it matters on Pinterest! Because there, people are not seeing one photo on a webpage by itself. They are seeing your free stock photo pin next to dozens of photos, often about very similar subjects. You chose your photo because it looked nice and matched what you were writing about – but how many people wrote about the same thing and used the same photo?

One of my clients wanted 25 pins and Canva templates from me, and since I usually design in Photoshop and Stencil, I played around with Canva to get used to it. One of the designs I created was a simple travel blog post pin, using one of the free stock images I found in their library.

Check out the image below. I apologize if it takes a bit to load; it’s pretty large. These are the pins that Pinterest thinks are similar to the pin I created with a free stock photo. I blacked out the promoted pins since we’re looking at regular pins. (Why so many promoted pins, Pinterest?)

I highlighted in pink every image that uses the same free stock photo I used:

Why you should not use free stock photos for Pinterest

That’s a lot of pink, right?

Do you want to be competing with so many pins that use the exact same image that your pin does?

I didn’t think so!

Again – it’s not that free stock photos are bad. They’re much better than illegally using photos you find online with a search engine. It’s just that so many people are using them on Pinterest, it makes it hard for your pins to stand out if you use them. And the pins that stand out (in a good way!) are the ones that get more clicks and repins.

And there are ways of using free photos that can work for Pinterest. I’ve used free stock photos myself. If you take a look at the older posts on this site, pretty much all of them use free images. But check out the pins at the bottom of each post – most have a color overlay with white text on top, both of which hide a lot of the image. This is one way you can use free stock photos on Pinterest, but still have your pins look different from others that use the same pin.

But from now on, I plan to use purchased images to make my pins stand out.

Here are some of my favorite places to buy fun, unique stock images:

DepositPhotos *affiliate link – I use this site for a lot of my key art, including the Create Wherever header image! You can buy downloads, or get a monthly subscription. The best offers usually give you images for around $1 each.

IvoryMix *affiliate link – Gorgeous flatlays, with plenty of whitespace for text. You can get a subscription (like I did!) to get access to the full library and monthly new items, or purchase individual photo packs. There’s even a scene creator if you want to use your own backgrounds! Kayla does offer free stock images as well, and since IvoryMix is not as well known as sites like Pexels, if you really can’t pay a few dollars for unique images, start with her free ones if they fit your brand!

StoryBlocks (formerly GraphicStock) – I love that I can buy a one-year subscription to this site and download any photos as I need them! It makes a great choice for blog post graphics and pins, like the ones I’m using for this post! They did just add a Marketplace option with additional photos you can buy a la carte (with a discount if you have the subscription), so if you only need a few that can be a great option.

DealJumbo *affiliate link – This site is famous for its bundles! They sell not just stock photos, but fonts, mockups, and other design elements. It’s great when you are looking to have a collection of similar images to create a streamlined, branded look for your pins.

What are some of your favorite sources for stock photos?

Want to hire me as a Pinterest Designer and Manager to help you get more traffic, leads, and income for your blog or business? Check out this page to see what I can do to help you grow!

Work-At-Home School: Improvements Needed

Work-At-Home School: Improvements Needed

Work-At-Home School: Improvements Needed

Caitlin Pyle launched her Work-At-Home School this week, a collection of online courses meant to give you the equivalent of a college degree in starting a business you can run from home. The launch was surrounded by an awesome five-day Work-At-Home Summit, which featured video sessions with the teachers of those courses. Chances are, if you’re on the email list of any of those teachers, you’ve heard about this. If not, you can find out more on the official site (not an affiliate link).

The School is available in three pay tiers, with most of the best and most in-depth courses being reserved for the highest tier (which is still a steal for the intro price of just under $500!). I’m actually already taking one of those courses, Gina Horkey’s 30 Days or Less to Virtual Assistant Success – which I plan to review in a later post!

But I really have a problem with SOOOO much info being dumped in the brains of those just getting started on their journeys of working from home. I’ve been there. It’s paralyzing. You can spend thousands on online courses, finish some, do 10% or less of others, and never make a penny with your business! Partly because you keep switching tactics as you follow all the different advice, partly because your imposter syndrome is urging you to “learn more” before you launch, and partly a few other things, like life, family, day job, finding your niche, coming up with a business name, building your website, getting a logo, etc.

So I’m wondering how many of these students are going to actually start a thriving business? How many more are going to start a course or two, get completely overwhelmed with all they have to learn before they can even start to make money, and end up abandoning the idea and maybe even blaming Work-At-Home School for their failure?

I don’t know how the course is set up on the inside, since I don’t plan to purchase it (I have too many other courses, travel plans, and a LinkedIn Learning subscription). The WAHS may have plenty of ways to help students stay focused and engaged, and actually build their businesses. But if I was bringing together a bunch of courses like this, I would do things differently:

I would charge a monthly fee (maybe $50 – just 10% of the highest tier) that includes:

  1. Access to the school’s Facebook group
  2. A couple of free short courses/ebooks, focused around deciding what your business will do, setting up a website, email opt-ins – basic stuff
  3. Insane discounts on all the other courses available
  4. A business mentor to contact either via email, Slack, or a 1/2 hour strategy video call each month to discuss how things are going and which course might be best for them to take next, depending on their personality, business, growth, past courses, and current struggles


Improvements for students:

  1. Less overwhelm – a few easy courses to start, and 1-2 at a time after that
  2. Lower cost barrier to entry
  3. Monetary investment in each paid course – yes, this will be an additional payment, but paying that will give you the motivation to make the investment worth it
  4. Personalized advice about where to go next, so your business can grow and thrive


Improvements for me/Caitlin if she used this method instead:

  1. More satisfied students
  2. Reoccurring monthly income, with the only added cost of the business mentor(s) for those students who specifically use that option
  3. Incentive for teachers to provide quality courses and updates as students choose which ones they’re taking (with advice if wanted)


Improvements for teachers/course creators:

  1. Reoccurring income as students take their courses when recommended
  2. Only engaged students joining their own groups and email lists

What are your thoughts? Do you like the all-you-can-eat option for a one-time fee that the Work-At-Home School offers, or would you prefer a monthly fee that gives you a monthly mentor session and a GroupOn-like discount on dozens of courses? And if you have signed up for WAHS, I’d love to hear what you think of it!

Want to hire me as a Pinterest Designer and Manager to help you get more traffic, leads, and income for your blog or business? Check out this page to see what I can do to help you grow!

31 Days of Blogging

31 Days of Blogging

31 Days of Blogging

Here it is – day 31! I reached my goal of blogging every day in the month of May!

What I learned:

Blogging isn’t easy. I mean, I know it wasn’t, but actually having to come up with new content every single day took a lot of energy and a lot of hours.

I have a lot to say about certain subjects. Some blog posts could have gone on much longer, but for sleepiness and the clock approaching midnight. Others I felt like the one blog post was enough for the decade for me.

I knew I write to discover. I didn’t think through how rambling that could make my blog posts, especially since I come up with the title first. I may try keeping a blogging journal offline, and reformatting sections of that into better-structured blog posts.

What I regret:

Spending so much time blogging. I figured out about 10 days in that daily blogging isn’t what I want to do – not when I’m also learning and trying to build a business. But I finished out the month out of stubbornness – and the victory feels a bit hollow. I could have finished the Design Skills course this month, but I’m only about halfway through. I could have been sending out proposals to perspective clients and creating beautiful items for my portfolio. Would I have if I hadn’t been blogging instead? Maybe.

Coming up with a solid list of topics before the month began. I knew I wanted to review Design Skills modules, but some were very in-depth, so for most of them there was no way I could watch the videos, complete the projects, and blog about the module in one day. Or even two days. Especially with a full-time job. So blogging about the modules and Bucketlist Bombshells in general only used up about a quarter of the days when I was expected it to be more like half. I ended up wracking my brain for ideas at 10pm some nights.

No time for design and promotion. Since I was spending my hours creating content for this blog, I had little free time to work on the design. I did do a few things here and there, but until I had a 4-day weekend over the holiday, the site didn’t look great. And I still have tons more to do. Not only that, I was embarrassed by the design and some of the shorter posts that didn’t provide much content for my readers, so I didn’t want to share posts via social media. Toward the end I shared about the site a bit in different groups, but I still felt embarrassed.


Have you ever reached a goal that probably wasn’t the ideal goal for you? What did you do about it?

Want to hire me as a Pinterest Designer and Manager to help you get more traffic, leads, and income for your blog or business? Check out this page to see what I can do to help you grow!

Financial Snapshot for Later Travel

Financial Snapshot for Later Travel

Financial Snapshot for Later Travel

Both freelancing and travel drastically influence your finances. If you haven’t done much of either yet, it’s a good time to look at how you spend your money to help prevent issues in the future.

Start out by keeping a written record of your spending. I like using Excel for this, but you can easily use Google Sheets or some sort of money tracking app. Make sure you track all kinds of spending – bank transfers/withdrawals, credit cards, and cash.

Assign each purchase/bill to a category. Have as many or few as you like, but pick a system that works for you and is general enough to use around the world (for example, instead of “gas” or “car payment” use “transportation”). Also, make sure to include your new business expenses in their own category.

I generally like to add up expenses monthly so I can then do averages based on the last 3 months, 1 year, etc. This will give you a good ballpark figure of what you need to make working at home – of course if you spend a lot on gas for commuting, lunches out, or clothes you only wear at work, it may be a bit lower.

Now, go through each category and think hard about what you will need to keep paying for if you are traveling frequently. You may need to make two columns – one for part-time travel, one for full-time. It all depends on what you want. I know that even if I am able to live outside the US all year, I will still want to make long visits home to see my family. So I will probably want to work out a solution with my roommates where I pay rent year-round (instead of renting a storage unit and having to get a hotel or something when I visit), but only pay utilities if I’m actually living here during the month.

If I was traveling most of the year, but still spending a couple months here at home, I imagine my home country expenses would include:

  1. Rent (Storage)
  2. Car Insurance (I would see if I could subsidize this by having one of my siblings pay to borrow my car – otherwise I would change my policy to the bare minimum so it would be a lot cheaper)
  3. Health Insurance (currently paid by my employer, I would need to figure out the best option for the months I am home, as well as abroad)
  4. Phone/Internet/Subscriptions (I have a prepaid phone plan through Straight Talk, so I can just pay for it when I’m home and use a local SIM abroad. Internet would hopefully be treated like a utility with my rental, so I can just pay when I’m here. Entertainment subscriptions will depend on the country restrictions – I would like to keep using Netflix, Hulu, and Google Play Music when I can)

So I will then add that monthly total (aside from health insurance, since I don’t know what I’ll be able to get, it’s under $400 when I’m not in the US) to my monthly business expenses and my estimated cost of living in another country (I’ll use Nomad List to get a rough guess, but then put together some actual monthly expense scenarios based on researched costs).

I also want to set aside a healthy amount for big expenses (plane ticket, new laptop, etc.). That will be in addition to my “quit my day job” savings threshold – which is generally recommended to be 3 months of expenses.

What expenses will you still have in your home country if you become a digital nomad?


Want to hire me as a Pinterest Designer and Manager to help you get more traffic, leads, and income for your blog or business? Check out this page to see what I can do to help you grow!

Holidays Abroad

Holidays Abroad

Holidays Abroad

As I celebrate Memorial Day here in the United States, I cannot help but wonder what American holidays will look like for me in other countries. I’ve seen posts about expats trying to recreate their favorite holiday foods (to varying degrees of success) and feeling homesick on those days.

I’ll be spending this Labor Day in Paris, France. It will also be my brother’s birthday this year, so I will miss out on that. Strangely enough, this past year he missed my birthday – because he was in Paris, France. For both occasions, it was/will be our first visit to France, and both times we were/will be missing out on the other’s 33rd birthday.

I won’t be too disappointed to miss Labor Day, as it’s basically a day off work with a picnic to celebrate the end of summer. In my family’s case, we usually celebrate my brother’s birthday around that day as well. In the past, we would also celebrate my grandma’s birthday since hers was 2 days after my brother’s, but this will be the second Labor Day without her.

Most Americans celebrate Memorial Day the same way they celebrate Labor Day – in this instance, kicking off summer instead of ending it. As they bookend the season and both fall on Mondays, it’s easy to lump them together. But Memorial Day has a far more significant background – it remembers the sacrifice of all of those who have laid down their lives for this country. While I don’t know of any relatives who have died in combat, many of my relatives served and have since passed away.

My 5th great-grandfather, George Hart, was born in Germany, immigrated to the colonies, and fought in the American Revolution for independence from England. Both of my grandfathers fought in World War II for the Allies in Europe. My grandma’s cousin actually bombed their grandfather’s hometown in Germany during the war.

So I’m sure if I’m staying in the UK during the 4th of July or in Germany during Memorial Day (or Veteran’s Day), it will feel very weird to celebrate. But generally those are more family holidays, so without them around, I would be less likely to celebrate anyway.

Most of the countries I would want to visit for an extended period do celebrate Christian holidays like Christmas and Easter, so while I am sure the traditions are different, I will still be able to celebrate them easily within a different country. And I didn’t grow up celebrating Halloween, so I won’t miss it.

Thanksgiving will be a big one, and from what I’ve read, this is the one that often hits expats the hardest. It’s not only the homesickness and missing the great food – it’s also because this is the start of the Christmas season, and if they have no plans to go home for Christmas, the sadness spreads to this holiday as well.

Have you ever spent a holiday outside the country of your birth? How did you celebrate it?

Want to hire me as a Pinterest Designer and Manager to help you get more traffic, leads, and income for your blog or business? Check out this page to see what I can do to help you grow!

Brand Consistency

Brand Consistency

Brand Consistency

Brand consistency is a topic I’ve been reading about a lot lately. Basically, when a business (or even a blog) keeps certain elements the same across their site and various platforms, people are more able to recognize the business, become familiar with it, and eventually start a relationship with the business by following them via social media or email, and by buying their product or service.

There are three aspects of brand consistency that businesses can use in varying degrees.

Visual Consistency

This is what most people think of when you talk about branding, and it’s the easiest one for potential clients and customers to spot. It’s also where my focus has been for the past month or so as I build my own brand’s visual components and study how to create them for others.

Every business should have the basics, such as a consistent logo, fonts, and colors. Photos are one area that can get tricky, since new ones may need to be added constantly for some businesses. I know some businesses use the same photographer for all of their main photos. Others use the same Adobe Lightroom preset or the same Instagram filter to achieve a cohesive look.

When I was selecting my new header image to go along with my new logo (please, leave a comment letting me know what you think of it!), I bookmarked the page with all of that model’s other images so I could have some variety while maintaining a very consistent look.

Also, in my blog’s theme, Divi you can set up every single blog post to have a different look, if you want. But that doesn’t make a site look like it belongs together. Instead, I set up a global header that I can add to every post, and if I decided I need to change it as I refine my brand, I can go to one place and it will be updated everywhere.

Tone Consistency

Not only should the visual elements of a business be consistent, the tone of the business should be as well. This applies to not only the written words, but spoken, if a business is holding webinars, doing a podcast, or even has a simple welcome video on their site. Writers talk about “finding their voice” and a business should have a distinctive voice as well, especially if they produce a lot of words – like bloggers, content writers, podcast hosts, and online learning instructors.

If you are blogging or wanting to start a solo business, the advice is often to “just be yourself”. While I agree that authenticity is key (and you may be found out quickly if you add in audio or video and who you are doesn’t match your writing), being yourself could mean about 50 different things for one person. We are all a bundle of contradictory traits.

A lot of branding says to “pick three words” but doesn’t give you much help as to deciding which three are best out of the dozens you could use to describe yourself or your business. So let’s try it this way:


What are 5 things you like about yourself? Think of things that would make you happy if people complimented you about them. Make sure that the compliment would feel genuine and make you think, “Yes, I am stylish”, or organized, or creative.


Now think of your potential audience, or customers, or clients. Which three of those five words would make them more prone to trust you, or like you, or consider your work high quality, if they knew that about you? If you need to, you can add one word that is more related to the business instead of to you specifically, or something you aspire to – but make sure at least 2 of the 3 words are firmly grounded in who you are.


Keep those three words in mind as you produce any content for your brand. Try to bring out those aspects of your personality a bit more, in a way that feels genuine. If you do that, you’ll be well on your way to having a consistent voice!

Content Consistency

This covers three areas – frequency, format, and subject matter.

Frequency is pretty basic – find your sweet spot for how often you can create excellent new content. As I’ve discovered, posting once a day with my current schedule leads to posts that only scratch the surface of topics I want to explore further, and takes away too much time I should be investing in other areas to build my business. So I’ll be trimming things back to around once a week in June, and see how that goes. Bottom line, people should know when to expect new content from you, not matter how frequently you decide to share.

Format can tie into some visual components, and it’s best to not have every type of content have the exact same format (all top ten posts, all video how-to posts, all review posts) unless the premise of your business relies solely on that format of content. But each similar format should have the same structure – not having some top ten lists in a slideshow and some in a list, for example.

Subject matter will depend on how narrow the focus of your content. Lifestyle bloggers can have a very broad area of subject matter, while a camera review site would have a more specific area.


Those are a lot of areas to consider when trying to build brand consistency (though I have seen FAR more extensive lists). One important thing to remember is not every business will focus the same amount on each of those areas. You can have a little leeway in one area if you make sure the others are strong. Some examples:

A lifestyle blog can talk about everything under the sun, as long as it has a very strong tone and good visual consistency.

A model train company can hire a few different hobbyists with very different tones to blog on their site, since the subject matter is so narrow, and can use formatting and visually to maintain consistency.

A designer can let the visual component of her business speak for itself, and focus less on her words.


Which area of brand consistency is most important for your business? In which area does it need the most help?

Want to hire me as a Pinterest Designer and Manager to help you get more traffic, leads, and income for your blog or business? Check out this page to see what I can do to help you grow!

Designing Create Wherever

Designing Create Wherever

Designing Create Wherever

I’ve spent a good portion of the past two days designing the logo for Create Wherever. It’s been an interesting process.

Quite a few months ago, I saw a discount on Tailor Brands’ logo design package. Since I was studying visual design, I didn’t think I’d use their service, but I ran a few business names through it for fun. One of the ideas it gave me was for a calligraphy font paired with an all-caps serif. I liked the idea and the contrast. I didn’t like the exact fonts they chose, and there was no way to change them. I also didn’t like the idea of having basically the same logo with different words that who knows how many other people chose.

But since then, I’ve kept an eye out for a brush script font that would look good with the word, “Create”. After I started the logo design module of the Design Course, I knew it was time to finally design a logo for Create Wherever. I pulled up all my Creative Market fonts and installed a few. One immediately stood out as a good candidate, but I thought the “C” was a bit too narrow.

The next part of the process was seeing if I could find a good font to match for “Wherever”. I tried a couple serif fonts, but didn’t like how they went with the brush font. So I turned to sans serif fonts. I really wanted the “W” to have a bit of uniqueness since I wanted to use it in the favicon, but most were super plain.

Two days ago, I decided to buy a huge font bundle that DealJumbo was offering. It had a large number of gorgeous fonts, and I knew if my current font didn’t end up working, one of these would be a great fit for this site. It would also be awesome to have so many font options for future design projects.

I didn’t end up using one of those fonts, but I did find a great glyph within the bundle to add an extra swoosh to my horizontal logo. It matched the font perfectly.

I narrowed my sans serif font options down to two choices. One had more of a playful vibe, but there was not enough contrast with the brush font. The other was more sleek and sophisticated, and even though I liked it less, it was the better match.

Now I’m working to have the rest of this site match the new logo. So be prepared for a few changes ahead, and let me know what you think of the new look!

Want to hire me as a Pinterest Designer and Manager to help you get more traffic, leads, and income for your blog or business? Check out this page to see what I can do to help you grow!

BB Design Skills Course: Module 5

BB Design Skills Course: Module 5

BB Design Skills Course: Module 5

I am finally starting the next module of the Bucketlist BombshellsDesign Skill Course! I am still working on Module 4, since logo design is such a huge endeavor – I’ve had a lot of fun trying out different font variations, and I even bought some new fonts to play with!

Module 5 focuses on branding style boards and guides. Basically, you are putting everything you created from the previous module into professional documents to deliver to your client. As such, this module is a lot shorter (less than half an hour of instruction over 4 videos) and only teaches a few things.

Cassie explains the differences between a board and a guide – a branding style board displays all the branding elements in one document and a branding style guide tells you how certain elements should be used (namely fonts) and provides codes for color palettes. She provides a beautiful template for you to use for each document, and walks you through how to add items you’ve previously created.

She also shows you how to add some graphic elements to the board – like line art and a website button – to provide that extra bit of value to your client. She also explains how seeing everything together can help you spot a few things to tweak before the branding style is finalized.

Near the end of the lesson she explains how you need to save each element as a separate document to deliver to your client as .png (for transparency), .jpg, and .ai (Adobe Illustrator) files. She suggests placing all of these in a Dropbox folder you can share with your client.

I was a little disappointed that this module didn’t have more content, but all of the concepts presented were covered thoroughly.

Do you have a style guide for your own business?

Want to hire me as a Pinterest Designer and Manager to help you get more traffic, leads, and income for your blog or business? Check out this page to see what I can do to help you grow!

Consistency vs. Unpredictability

Consistency vs. Unpredictability

Consistency vs. Unpredictability

Some view consistent people as boring and unpredictable people as fun. Others have an opposing option, viewing consistent people as reliable and unpredictable people as irresponsible.

I’ve heard of people using only one filter on Instagram to achieve a unified look. And designers cull their portfolios and only display projects that fit their overall aesthetic.

When building a business, you need to have some level of consistency. But as a creative person, doing the same thing day in and day out will stifle your inspiration.

I know I’ve always been more consistent at things when I force myself to do them daily. Whether it’s journaling or learning a language, some things just need daily tasks to add up to something great.

Other things, not so much. For example, you may have noticed that I have been blogging every day in May. I wanted to get back into blogging, and I knew a daily task would keep me accountable toward doing so. I also wanted to see what types of blog posts I enjoy producing. And while topics have varied, I have tried to keep them consistently aimed at creatives who want to work remotely, possibly in other countries. I have been successful in those goals.

But other goals related to this idea have been less successful. I really would have liked to provide more long-form, in-depth content for my readers. But when I require myself to churn out a post a day, there isn’t time (not that short-form content can’t be valuable – look at Seth Godin – but I have shortchanged many topics this way).

Also, because I work fulltime, blogging has taken away from the time I wanted to spend working through Bucketlist Bombshells’ Design Skills course. You may have noticed my last review post was of their logo design module – and I still haven’t completed the mini projects for that module. To be fair, it is a complex subject, and I have spent several hours in Illustrator playing with different logo designs and techniques. But my goal of launching my business would be a lot further along if I wasn’t blogging every day.

I do plan to finish the month (since I am not working the next four days, that will give me some time), but after that, I will likely be cutting back my blogging schedule to once a week. Still consistency, but a type that will give me more freedom to be unpredictable in other areas of my life, and better at providing quality content for you.

And maybe that’s the key for creative work inside a business – finding the level of consistency that works for you. If you’re visiting a new country every month or two, maybe having your work be a bit more rigid will leave you more energy for adapting. If you’re working from your home every day, maybe try something new with your business.

There will always be someone who thinks you are too unpredictable, or too consistent. Find the balance that works best for you, and seek out clients within the same range who will appreciate the exact blend of creativity and structure you provide.

Want to hire me as a Pinterest Designer and Manager to help you get more traffic, leads, and income for your blog or business? Check out this page to see what I can do to help you grow!

Choosing a City to Work from Remotely

Choosing a City to Work from Remotely

Choosing a City to Work from Remotely

One thing to consider when working remotely is where exactly you will be operating your business! If you’re wanting to work from home in your pajamas, the answer is easy, but if you want to use your new-found freedom to see the world, the possibilities are endless.

I’ll not be going into visa requirements, since that is different for every type of passport and every country, as well as constantly changing. It will also depend on how long you would want to stay in a country.

Most people have a vacation mindset when they travel. If they want to visit 10 countries in two weeks or go explore places without reliable internet, they can. But digital nomads need to be aware of how a change of location will affect their work and their clients. They can still go on a whirlwind tour or trek into the wilderness, but they do it within vacation time they’ve budgeted for themselves and build a more solid atmosphere for their daily lives.

But you can still build this solid atmosphere in amazingly cool places you’ve always wanted to visit!

There are certain variables you’ll want to consider when choosing where to go, and fortunately, a great site exists to help you gauge what cities are ideal for digital nomads! The Bucketlist Bombshells introduced me to Nomad List, a free site (though becoming a paid member has additional benefits) that presents many statistics to help you choose a city!

The main 4 variables the Nomad list looks at are cost of living, fun, safety, and internet. Each of these are further broken down into specific aspects, and they all add up to a Nomad Score.

You can then filter the results by your own preferences. Say you don’t really care where you go as long as you can live there cheaply – you can look for places under $1000 a month. Say you want to go somewhere in Europe – click on Europe. Say you only want places with very good internet – you can see the average bandwidth for the city, and find some coworking spaces with reliable speeds. Say you want to easily fly to surrounding areas – search for airport.

For myself, I’ll like to work from Europe and travel frequently to other countries. The cheapest places are in eastern Europe, but most cities I’d like to visit are in western Europe. Berlin is centrally located and a reasonable $2000/month, and has a very high Nomad Score (plus Germany has a freelancer one-year visa option for longer stays). I would prefer the UK, but prices range from $2500-3000, though that pales in comparison to Switzerland’s and Denmark’s $4000 a month!

And remember, as a digital nomad you’ll be able to change up where you live frequently – so you can balance out a more expensive location with a cheaper one part of the year.

Where would you like to base your business, at least for a few months?

Want to hire me as a Pinterest Designer and Manager to help you get more traffic, leads, and income for your blog or business? Check out this page to see what I can do to help you grow!