Designing Create Wherever

Designing Create Wherever

Designing Create Wherever

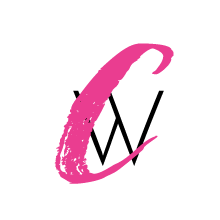
I’ve spent a good portion of the past two days designing the logo for Create Wherever. It’s been an interesting process.

Quite a few months ago, I saw a discount on Tailor Brands’ logo design package. Since I was studying visual design, I didn’t think I’d use their service, but I ran a few business names through it for fun. One of the ideas it gave me was for a calligraphy font paired with an all-caps serif. I liked the idea and the contrast. I didn’t like the exact fonts they chose, and there was no way to change them. I also didn’t like the idea of having basically the same logo with different words that who knows how many other people chose.

But since then, I’ve kept an eye out for a brush script font that would look good with the word, “Create”. After I started the logo design module of the Design Course, I knew it was time to finally design a logo for Create Wherever. I pulled up all my Creative Market fonts and installed a few. One immediately stood out as a good candidate, but I thought the “C” was a bit too narrow.

The next part of the process was seeing if I could find a good font to match for “Wherever”. I tried a couple serif fonts, but didn’t like how they went with the brush font. So I turned to sans serif fonts. I really wanted the “W” to have a bit of uniqueness since I wanted to use it in the favicon, but most were super plain.

Two days ago, I decided to buy a huge font bundle that DealJumbo was offering. It had a large number of gorgeous fonts, and I knew if my current font didn’t end up working, one of these would be a great fit for this site. It would also be awesome to have so many font options for future design projects.

I didn’t end up using one of those fonts, but I did find a great glyph within the bundle to add an extra swoosh to my horizontal logo. It matched the font perfectly.

I narrowed my sans serif font options down to two choices. One had more of a playful vibe, but there was not enough contrast with the brush font. The other was more sleek and sophisticated, and even though I liked it less, it was the better match.

Now I’m working to have the rest of this site match the new logo. So be prepared for a few changes ahead, and let me know what you think of the new look!
Want to hire me as a Pinterest Designer and Manager to help you get more traffic, leads, and income for your blog or business? Check out this page to see what I can do to help you grow!

Creative Market and Logo Design

Creative Market and Logo Design

Creative Market and Logo Design

In the Logo Design module of the Bucketlist Bombshells’ Design Skills Course, Cassie mentions Creative Market as a great place to buy unique fonts for logo design. I was already familiar with Creative Market, and for a good reason:

They give away design elements every single week!

I don’t always remember to download the files before the week ends and the 6 (yes, SIX free items every week) items are replaced by new options. But over the past couple years I’ve amassed a pretty large library of graphics and fonts that I can now use in my design business!

You’ll want to read through the license terms pretty thoroughly to make sure you’re using the files legally, but you can use the free items and any ones you purchase for clients. They offer bundles all the time, so you can get a great deal and support other creatives at the same time!

But the free items generally are full and complete versions, and you can build beautiful things with them in Adobe Creative Suite.

Thanks to the BB course module on logo design, I was itching to try making a new logo for this site! So I installed some of the free fonts from Creative Market that I thought might be a good fit. I also tried matching them with a few different free Google fonts, with the idea that I could use that font on this site for a more cohesive look. One of the fonts even came with some watercolor elements!

Here’s what I came up with:

I used the Island Style font from Creative Market, and paired it with the Merriweather Sans Serif Google font. I then added a watercolor element that came with the Pleasures font from Creative Market. All free!

That isn’t the final version of Create Wherever’s new logo, but it was really fun to make, and I can’t wait to try out new variations!

What is your favorite place to find new fonts?

Want to hire me as a Pinterest Designer and Manager to help you get more traffic, leads, and income for your blog or business? Check out this page to see what I can do to help you grow!

BB Design Skills Course: Module 4

BB Design Skills Course: Module 4

BB Design Skills Course: Module 4

Module 4 of the Bucketlist Bombshells Design Skills course introduces students to logo design. This is the module I was most excited about while I was considering purchasing these courses, and I thoroughly enjoyed it!

This module consists of 7 videos for well over an hour of instruction. It starts off with an introduction to logo design, then provides several tutorials on how to find fonts and colors for your logos.

I wish that Cassie had explained a bit more about font permissions for students that might not be aware of the differences. She downloaded a free font in the tutorial but didn’t mention that it was for personal use only and therefore would need to be purchased for client projects. This is especially important in logo design. Also, the font installation instructions only applied to Macs, so they might be confusing to PC users unfamiliar with the differences.

After that, there were two longer videos where Cassie demonstrated her exact process for creating both a simple and a more advanced logo. It was very cool to see her turn some sketches into a full-fledged logo. Her process was truncated a bit for the tutorial, as she generally tries out more options and gives clients a choice between several variations.

I was hoping that the advanced logo would have a bit more icon creation instead of just adding ornamentation to a simple logo. I wanted to see more of how Cassie used the various drawing tools in Illustrator, and it would have been also neat to see some text manipulation. In future updates of this course, it would also be helpful for students to hear some of the thought process behind the sketched ideas and how Cassie narrows down her selections before presenting to the client.

Some of the super helpful takeaways I got from this module:

1. Always design in black and white first before adding color. That helps you see if a design can stand on its own. Cassie even presents the black and white logos to clients first so they won’t be distracted

2. Never throw anything away as you’re designing! Just drag it off to the side so you can refer to it later if needed.

3. Textures can add beauty to a font or image.

4. Walk away from your work and come back to it later. You’ll see things you missed and get a better feel if the design is actually working.

5. You don’t have to be great at sketching to be a great designer.

Want to hire me as a Pinterest Designer and Manager to help you get more traffic, leads, and income for your blog or business? Check out this page to see what I can do to help you grow!